Capturing Stunning Photos at Historical Sites: A Practical Guide from Composition to
Historical sites hold a significance that extends beyond mere memories; they are vital mediums for conveying the identity of cultural heritage. However, photos taken at these sites often fail to capture their essence due to factors like cloudy weather, crowds of visitors, or the inherent beauty of the site itself. This is often due to a lack of "observational skills" and "shooting strategies," rather than technical limitations. To bring the historical meaning of these sites to life through photography, one must shift their perspective from simply "taking pictures" to "seeing."
Step 1: Analyze the 'Structural Characteristics' of the Site Before Shooting
The first step in creating compelling photos is preparation before even arriving at the site. Historical sites typically possess hidden "structural characteristics," such as the arrangement of buildings, the visual pathways created by paths, and the way light interacts with the site at different times of day. Understanding these elements can prevent aimless wandering and wasted time.
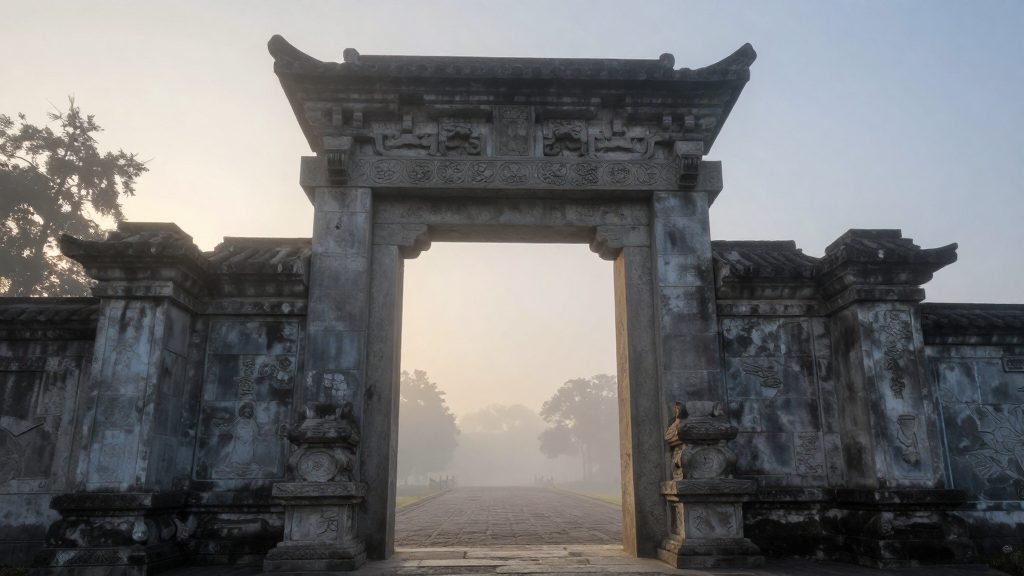
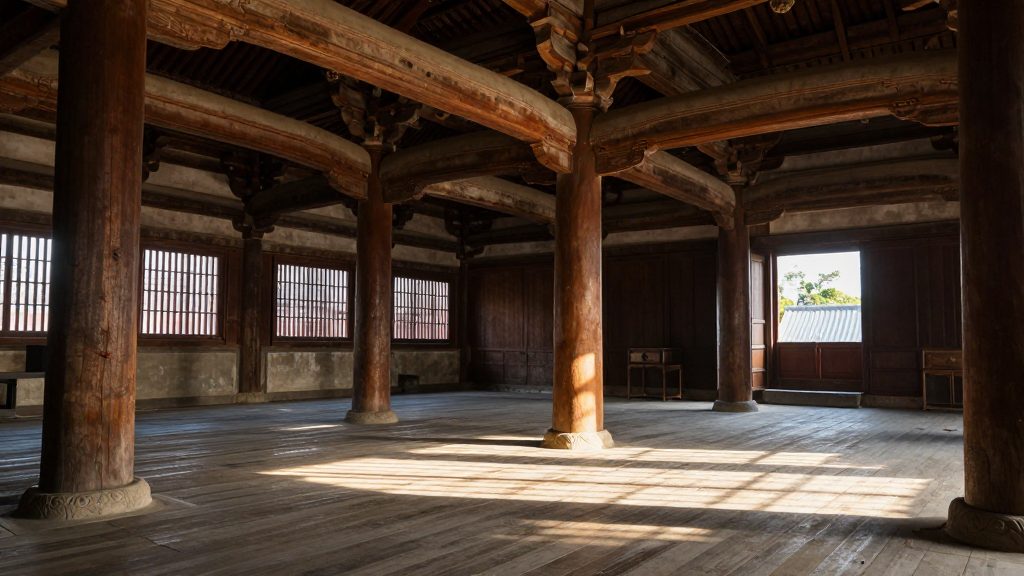
- Identify the axes and orientation of the buildings. For example, a main gate facing east or a pavilion facing west will be illuminated by special lighting in the morning or evening. This directional awareness is crucial for predicting the flow of light.
- Identify elements that obstruct your view. Before you start shooting, survey the area in a 360-degree circle to identify potential obstructions like trees, railings, or the heads of visitors. Imagine your perspective at eye level to avoid unwanted elements in your photos.
- Find the most emotionally resonant focal point. Some may focus on the main gate, while others might be drawn to the patterns on a wall or the traces left in the ground. This focal point should become the central axis of your composition.
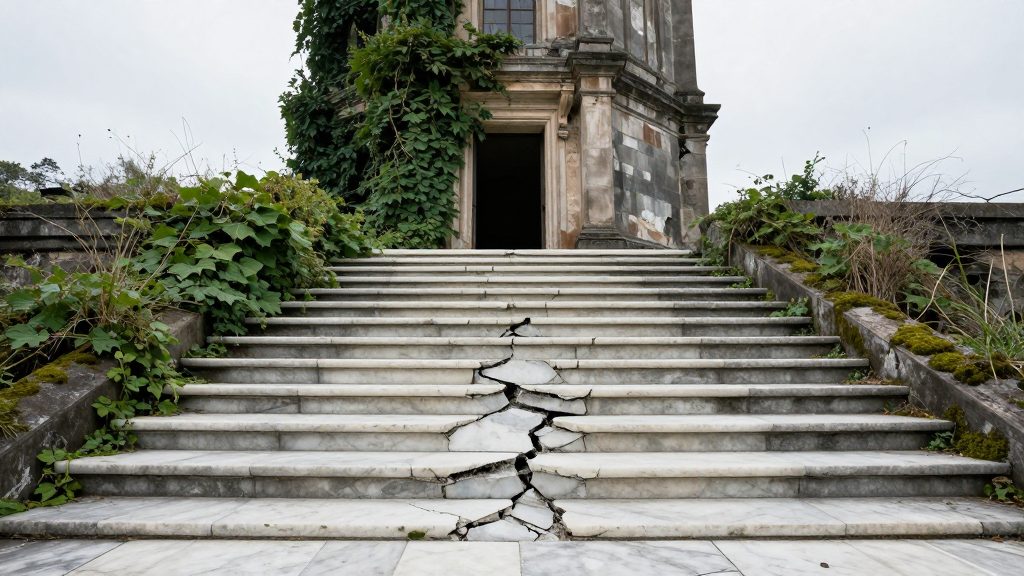
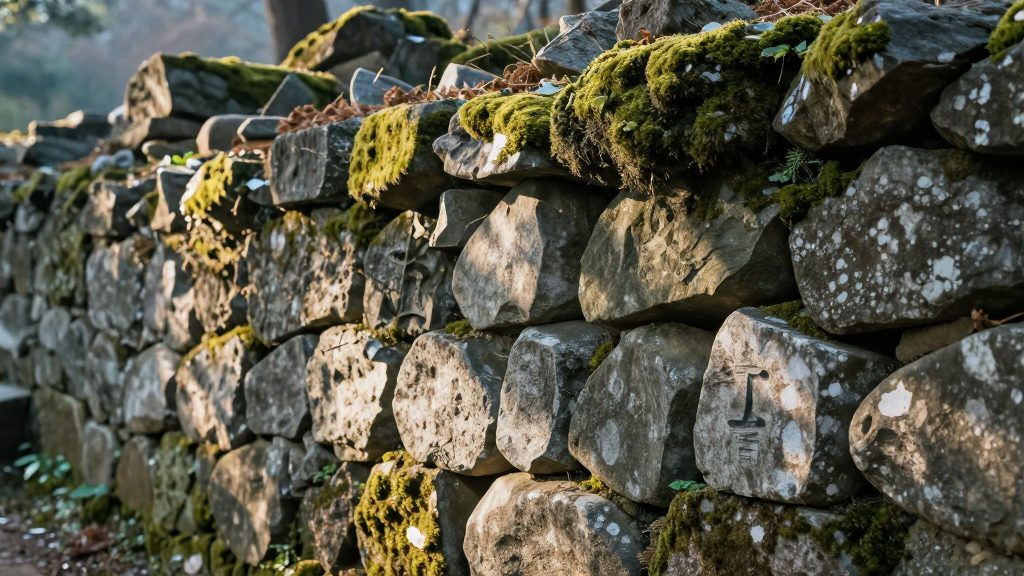
Tip: Spend 5 minutes "walking" around the site without a camera to study it. Familiarize yourself with the texture of the stones under your feet, the unevenness of the stonework on the walls, and the cracks where light penetrates. This experience will inspire you even after the shooting is complete.
Step 2: Accurately Interpret the Boundaries Between Natural and Artificial Light
While natural light is a valuable resource at historical sites, it can be too strong or insufficient. In particular, the texture and shadows of ancient buildings change dramatically depending on the angle of incidence of light.
- Between 9:00 AM and 10:00 AM, the west-facing walls of buildings are bathed in a warm yellow light, and shadows stretch long. This time is ideal for emphasizing clear tones and textures.
- Between 12:00 PM and 2:00 PM, direct sunlight is strong, leading to overexposure, reflections, loss of color saturation, and blurred details. During this time, consider shooting in the shade or using a light-absorbing filter on your lens.
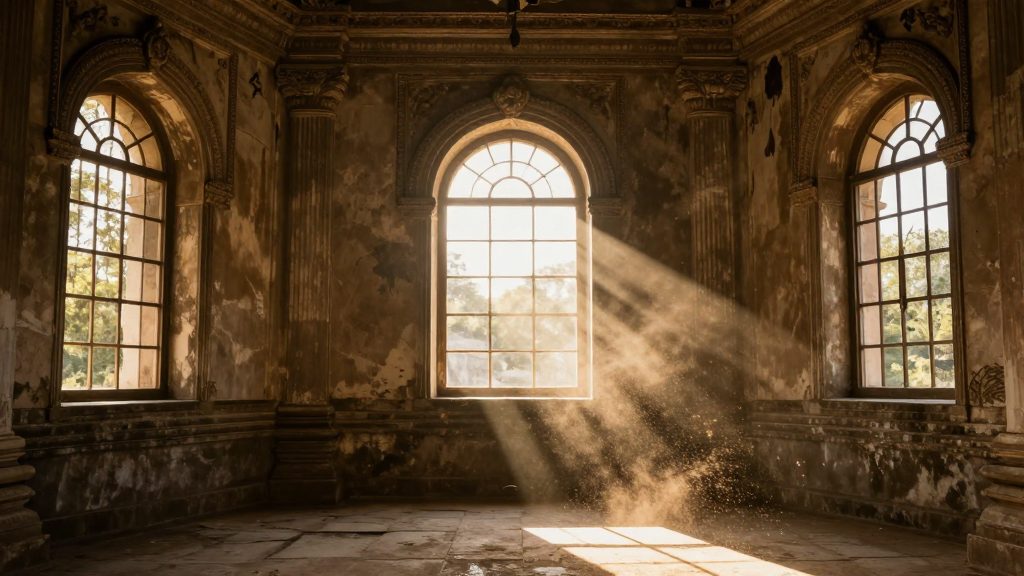
- 30 minutes before sunset is the most luminous time of day. The "twilight" lighting just before sunset softly depicts the earthy tones or stone textures of the buildings. This time adds a sense of tranquility and grandeur to the entire scene.
Tip: Set your shutter speed to 1/250 second or faster to freeze the flow of light and capture the "dynamic texture." This is especially useful for capturing the movement of shadows on a wall when it's windy.
Step 3: Compose Your Shots to Reflect 'Historical Significance'
The essence of photography lies not in what is "seen," but in "why it is shown." Photos of historical sites should not be mere landscapes; they should explain "why this place exists."
- Use contrast between close-ups and wide shots. For example, including both a large pillar and a small threshold can convey the "scale of humanity." This contrast implies the "role that people played in this historical context."
- Utilize leading lines. Look for paths that flow along walls or corners of staircases that draw the viewer's eye. This naturally guides the viewer's gaze towards the "historical center."
- Employ negative space. Leaving empty sky or walls behind a building creates a "space" that symbolizes the historical stillness and solitude. This is a key technique for capturing the "emotions you want the viewer to feel."
Step 4: Adhere to the 'Principles of Post-Processing' After Shooting
Even after a photo is complete, there is a responsibility to preserve the spirit of the historical site. Excessive adjustments or editing can compromise its original identity.
- Adjust the color temperature based on the "light of the site." Avoid adding artificial warmth if the natural light is bluish. This distorts the "atmosphere you experienced on site."
- Avoid excessive filtering of areas that have been omitted. For example, removing the dirt stains on a wall or the worn threshold will erase the "passage of time and history."
- Review the "captured moment" within 3 days after shooting. Reviewing too quickly can distort your emotions, while reviewing too late will fade your memories. This is an opportunity to reflect on "why you took that shot in the first place."
All of these steps begin with an attitude that goes beyond "taking pictures mechanically" and aims to understand and convey the essence of the historical site. Shooting is not just an act of preserving memories; it's a way for the historical space to "come alive again." Stand on site, and don't miss the moment when the morning sunlight touches the wall, the stillness of that moment, and the feeling of "being there."
Related posts
7 Practical Tips for Appreciating Cultural Heritage (Essential Checklist for Exploring
Exploring Cultural Heritage: How to Connect with the Land – Okcheon Myeongryang Historic
How to properly appreciate Korean stone monuments: A 6-step checklist for a more
Preserving Royal Architecture of the Joseon Dynasty: A Comparison of Methods Using Bricks
Popular posts
7 Practical Tips for Appreciating Cultural Heritage (Essential Checklist for Exploring
Exploring Cultural Heritage: How to Connect with the Land – Okcheon Myeongryang Historic
How to properly appreciate Korean stone monuments: A 6-step checklist for a more
Comments 0